Appendix G2: Enemy Ships & Weaponry
Phoenix II —FAQ (IOS)

BOOKMARK
FAQ (IOS) by light_rock_zz
Version: 5.3 | Updated: 07/29/2025
FAQ of the Month Winner: January 2020 | Highest Rated Guide
Appendix G: Phoenix HD
Appendix G2: Enemy Ships & Weaponry

| Phoenix HD Enemy Ships, Turrets & Bullets | |||||||||
|---|---|---|---|---|---|---|---|---|---|
| Scout | Marauder | Renegade | Jester | Revenant | Warlord | Reaper | Harbinger | Brute | Harpy |
| Enemy Bullets & Turrets | |||||||||
Enemy Ships

With every wave cleared, Enemy Ship health increases by a factor of 0.005.
Unlike Phoenix 2, a wave can only contain one type of Enemy Ship. However, if the timer for the current wave expires, the next wave will arrive regardless, which may cause different Enemy Ship types to be on field at the same time.
Here is the probability matrix of the next wave of Enemy Ships based on the previous wave of Enemy Ships. Each row adds up to exactly 1, which fulfills the law that the probabilities of all possible mutually exclusive outcomes must add up to 1.
- For example, you can determine that the probability that a wave of a Brute appearing after a wave of Marauders is 0.15 based on the table below.
| Next Wave | |||||||||||
|---|---|---|---|---|---|---|---|---|---|---|---|
| Scouts | Marauders | Renegades | Jesters | Revenant | Warlord | Reaper | Harbinger | Brute | Harpy | ||
| Previous Wave | Scouts | 0.5 | 0.29 | 0.1 | 0.1 | - | - | - | - | - | 0.01 |
| Marauders | 0.2 | 0.39 | 0.1 | 0.1 | 0.1 | 0.03 | 0.03 | 0.03 | 0.15 | 0.005 | |
| Renegades | 0.2 | 0.2 | 0.07 | 0.07 | 0.06 | 0.11 | 0.12 | 0.12 | 0.045 | 0.005 | |
| Jesters | 0.2 | 0.2 | 0.07 | 0.07 | 0.06 | 0.12 | 0.11 | 0.12 | 0.045 | 0.005 | |
| Revenant | 0.4 | 0.3 | 0.07 | 0.07 | 0.06 | 0.12 | 0.12 | 0.11 | 0.045 | 0.005 | |
| Warlord | 0.4 | 0.3 | 0.07 | 0.07 | 0.06 | - | 0.04 | 0.04 | 0.015 | 0.005 | |
| Reaper | 0.4 | 0.3 | 0.07 | 0.07 | 0.06 | 0.04 | - | 0.04 | 0.015 | 0.005 | |
| Harbinger | 0.4 | 0.3 | 0.07 | 0.07 | 0.06 | 0.04 | 0.04 | - | 0.015 | 0.005 | |
| Brute | 0.4 | 0.3 | 0.07 | 0.07 | 0.06 | 0.04 | 0.04 | 0.01 | - | 0.01 | |
| Harpy | 0.5 | 0.4 | 0.05 | 0.05 | - | - | - | - | - | - | |
Scout
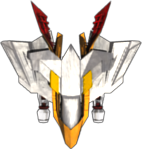
- Base Health
- Single Player = 10
- Co-op (Apple TV) = 12
- Base Score = 25
- Max per wave = 8
- Arrival Speed = 400, Hover Speed = 100
- Maximum Wave Challenge Rating = 200
- Cooldown time between current wave cleared and next wave starts arriving = 0s
- Next wave arrives if current wave still not cleared in 3s
- Possible weaponry categories:
- The only Enemy Ships where when destroyed, their bullets are not converted into score.
Marauder
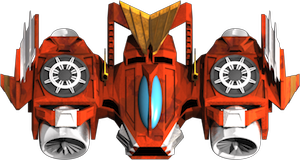
- Base Health
- Single Player = 65
- Co-op (Apple TV) = 84.5
- Base Score = 50
- Max per wave = 3
- Arrival Speed = 300, Hover Speed = 75
- Maximum Wave Challenge Rating = 200
- Cooldown time between current wave cleared and next wave starts arriving = 0s
- Next wave arrives if current wave still not cleared in 10s
- Possible weaponry categories:
Renegade
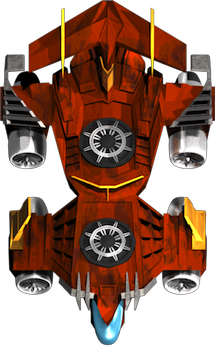
- Base Health
- Single Player = 85
- Co-op (Apple TV) = 110.5
- Base Score = 100
- Max per wave = 2
- Arrival Speed = 300, Hover Speed = 50
- Maximum Wave Challenge Rating = 180
- Cooldown time between current wave cleared and next wave starts arriving = 1.0s
- Next wave arrives if current wave still not cleared in 30s
- Possible weaponry categories:
Front Turret
(×0.75 of health)Rear Turret
(×0.55 of health)Boomerang Shot 


Wave 


Dart Lance 


Spiral Ninja Shot 


Sinusoidal Spiral Multi Dart Lance 

Vortex Spiral 


Vortex Wave Single 


Vortex Trench Vortex Wave 
MIRV Ball 


Jester
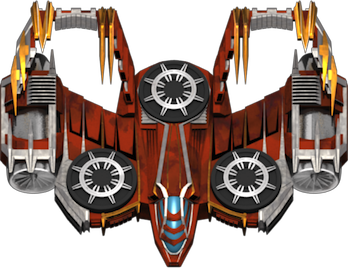
- Base Health
- Single Player = 110
- Co-op (Apple TV) = 143
- Base Score = 100
- Max per wave = 2
- Arrival Speed = 300, Hover Speed = 50
- Maximum Wave Challenge Rating = 160
- Cooldown time between current wave cleared and next wave starts arriving = 1.0s
- Next wave arrives if current wave still not cleared in 30s
- Possible weaponry categories:
Left Turret Center Turret Right Turret Cone Shot 


Diamond Turret 

Dart Shot 


Dart Lance Alternating Wave Ninja Shot Multi Dart Lance Dual Dart Lance 
Boomerang Shot Very Fast Cone Shot 


Revenant
- Base Health
- Single Player = 125
- Co-op (Apple TV) = 187.5
- Base Score = 150
- Max per wave = 1
- Arrival Speed = 150, Hover Speed = 50
- Maximum Wave Challenge Rating = 160
- Cooldown time between current wave cleared and next wave starts arriving = 2.0s
- Next wave arrives if current wave still not cleared in 120s
- Possible weaponry categories:
Left & Right Turrets
(×0.8 of health)Center Turret
(×1 of health)Wave Vortex Trench Spiral Vortex Wave Vortex Spiral Vortex Spiral Sinusoidal Spiral Sinusoidal Spiral Sinusoidal Cone 
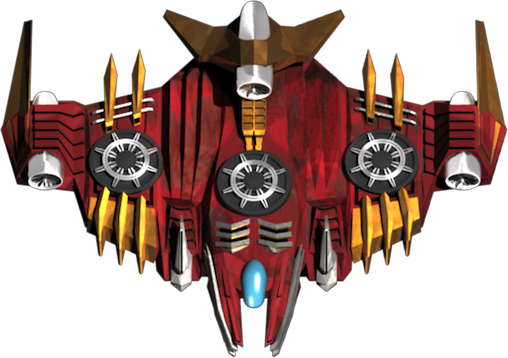
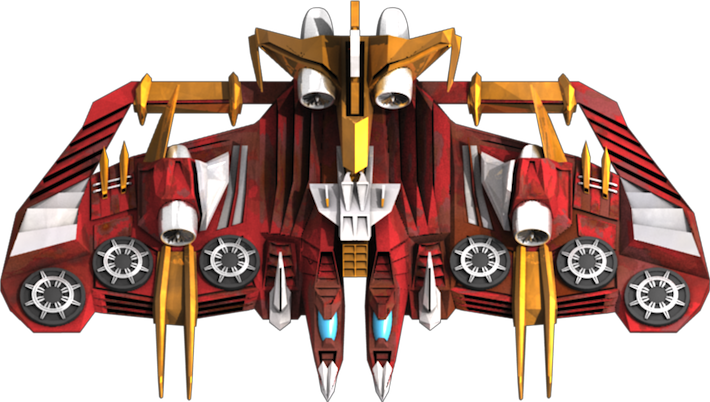
Brute
- Base Health
- Single Player = 165
- Co-op (Apple TV) = 247.5
- Base Score = 150
- Max per wave = 1
- Arrival Speed = 150, Hover Speed = 50
- Maximum Wave Challenge Rating = 160
- Cooldown time between current wave cleared and next wave starts arriving = 2.0s
- Next wave arrives if current wave still not cleared in 120s
- Possible weaponry categories:
Front Left & Right Turrets
(×1 of health)Rear Left & Right Turrets
(×0.1 of health)Dart Shot Comet 


Ninja Shot MIRV Ball (Brute) Boomerang Shot Dart Lance
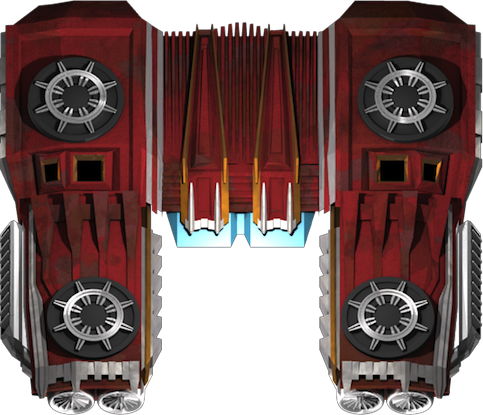
Warlord
- Base Health
- Single Player = 200
- Co-op (Apple TV) = 300
- Base Score = 150
- Max per wave = 1
- Arrival Speed = 150, Hover Speed = 25
- Maximum Wave Challenge Rating = 160
- Cooldown time between current wave cleared and next wave starts arriving = 2.0s
- Next wave arrives if current wave still not cleared in 120s
- Possible weaponry categories:
Outer Left Turret
(×0.8 of health)Inner Left & Inner Right Turrets
(×0.65 of health)Outer Right Turret
(×0.8 of health)Wave Cone Shot Wave Spiral Sinusoidal Cone Spiral Sinusoidal Spiral MIRV Ball Sinusoidal Spiral Vortex Wave Vortex Wave Single Vortex Trench Vortex Spiral Vortex Spiral
Harbinger
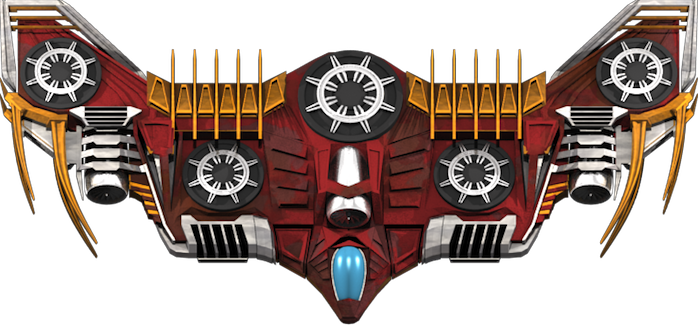
- Base Health
- Single Player = 200
- Co-op (Apple TV) = 300
- Base Score = 150
- Max per wave = 1
- Arrival Speed = 150, Hover Speed = 25
- Maximum Wave Challenge Rating = 160
- Cooldown time between current wave cleared and next wave starts arriving = 2.0s
- Next wave arrives if current wave still not cleared in 120s
- Possible weaponry categories:
Outer Left & Outer Right Turrets
(×0.65 of health)Inner Left & Inner Right Turrets
(×0.65 of health)Center Turret
(×0.72 of health)Dart Lance Very Fast Cone Shot Lance Blossom 


Dart Shot Dual Dart Lance Alternating Wave Boomerang Cone Shot 

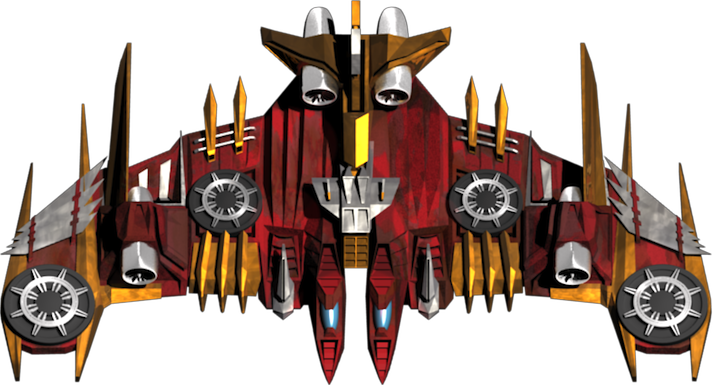
Reaper
- Base Health
- Single Player = 200
- Co-op (Apple TV) = 300
- Base Score = 150
- Max per wave = 1
- Arrival Speed = 150, Hover Speed = 25
- Maximum Wave Challenge Rating = 160
- Cooldown time between current wave cleared and next wave starts arriving = 2.0s
- Next wave arrives if current wave still not cleared in 120s
- Possible weaponry categories:
Outermost Left & Outermost Right Turrets
(×0.7 of health)Middle Left & Middle Right Turrets
(×0.8 of health)Innermost Left & Innermost Right Turrets
(×0.9 of health)Ninja Shot Dart Shot Very Fast Cone Shot Dual Dart Lance Dual Dart Lance Dart Lance Boomerang Shot
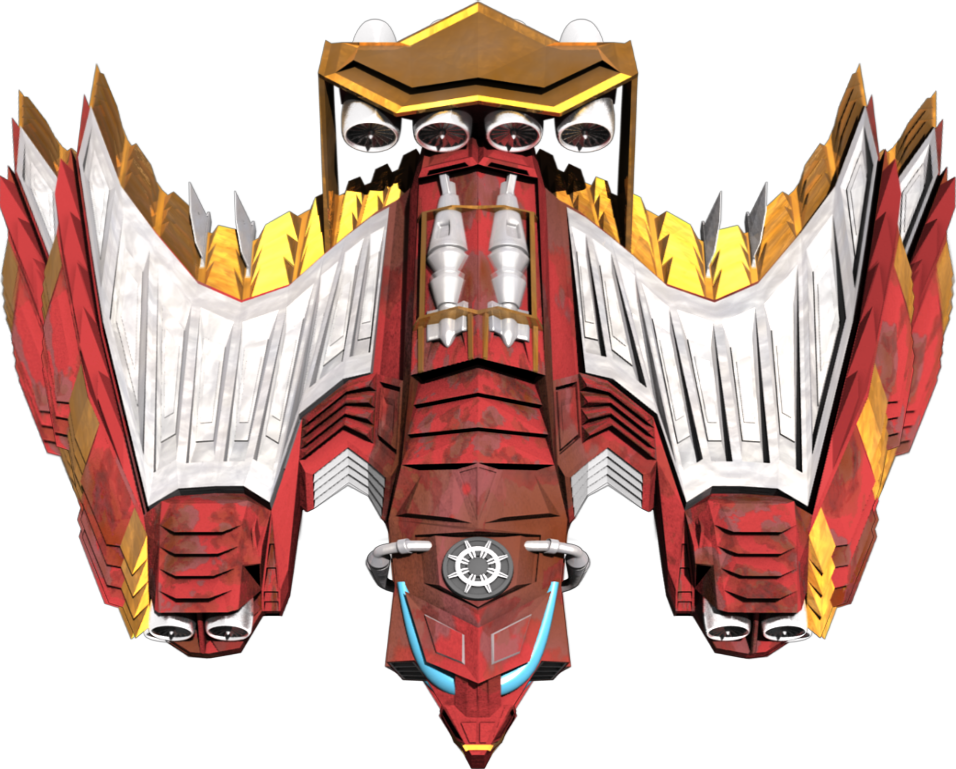
Harpy
- Base Health
- Single Player = 300
- Co-op (Apple TV) = 540
- Base Score = 175
- Max per wave = 1
- Arrival Speed = 75, Hover Speed = 25
- Maximum Wave Challenge Rating = 160
- Cooldown time between current wave cleared and next wave starts arriving = 3.0s
- Next wave arrives if current wave still not cleared in 240s
- Possible weaponry categories:
Left & Right Turrets
(×0.5 of health)Center Turret
(×1.2 of health)Very Fast Cone Shot (XLarge) 
Spiral (XLarge) Sinusoidal Spiral (XLarge) Lance Blossom (XLarge) Vortex Trench (XLarge) - Gives 50 bonus power particles upon destroyed
Enemy Bullets & Turrets
Bullets in Phoenix HD behave very differently.
- With the exception of bullets from Scouts , destroying a turret eliminates all bullets fired by the destroyed turret, which are converted into bonus score
 .
. - Turrets in Phoenix HD have very different firing patterns.
- Enemy Ships do NOT have Doomsday Weapons (so no Super MIRVs too).
- Enemy Ships also don't have lasers.
| Pellets | Darts | Shurikens (Normal) | Shurikens (Fast) | Shurikens (Slow) | Boomerangs | MIRVs | Comets | ||
|---|---|---|---|---|---|---|---|---|---|
| Appearance (normal) |  |  |  |  | |||||
| Appearance (blood) |  |  | |||||||
| Description | - | Fired only by Dart Shot | Fired by all dart turrets which fire in lances | Fired only by Vortex Wave Single | Fired only by Vortex Wave | Fired by all other shuriken turrets | Work like actual boomerangs that travel straight, but reverse after traveling a fixed distance. | Only trigger after a fixed time of 2.5s. Cannot be triggered by going near them. | Spawns pellets (normal) to the left and right as it travels vertically downwards. Has 3 different tiers, refer to Comet Category |
| Base Initial Speed | 100 | 150 | 100 | 100 | 50 | 350 | 245 | 70 | 100 |
| Acceleration | - | - | 400 | 50 | 150 | −450 | −130 | - | - |
| Base Minimum Speed | - | - | - | - | - | 75 | −300 | - | - |
| Base Maximum Speed | - | - | ∞ | 200 | 200 | - | - | - | - |
| Hitcircle | 5 | 6 | 6 | 5 | 5 | 5 | 10 | 5 | 8 |
| Damage | Normal (brighter red) = 10 Blood (deeper red) = 15 | 50 | |||||||
| Number of Point Defence Drone lasers to eliminate bullet | 1 | 2 | |||||||
Slow Shot Category | ||||
|---|---|---|---|---|
 |  |  |  | |
| Single Lane Pellet Launcher | Alternating Lane Pellet Launcher | |||
| Time between Shots | - | 0.25s | - | - |
| Shots per Burst | - | 4 | - | - |
| Reload Time | 1s | 1s | 0.2s | 0.2s |
| Challenge Rating | 1 (normal) | 2 (normal) | 6 (normal) | 12 (normal) 17 (blood) |
Diamond Turret Category | ||||
|---|---|---|---|---|
| Exclusive to Jesters | ||||
| | |||
| Time between consecutive rows | 0.16s | |||
| Reload Time | 1.0s | |||
| Diamond Pellet Formation (Width × Height) | 3 × 5 | 5 × 9 | 3 × 13 | 5 × 17 |
| Challenge Rating | 5 (normal) | 10 (normal) | 15 (normal) | 20 (normal) 25 (blood) |
Cone Shot Category | |||
|---|---|---|---|
| | | |
| 7-way pellet spread | 9-way pellet spread | ||
| Shots per Burst | 5 | 9 | - |
| Time between Shots | 0.18s | 0.18s | - |
| Reload Time between Bursts | 3.0s | 3.0s | 0.2s |
| Challenge Rating | 15 (normal) | 30 (normal) | 45 (normal) 55 (blood) |
Sinusoidal Spiral Category | ||||
|---|---|---|---|---|
| | | ||
| Normal | XLarge for Harpy | |||
| Number of Segments | 7 Shots × 3 pellets | 13 Shots × 3 pellets | 13 Shots × 3 pellets | 14 Shots × 4 pellets |
| Number of pellets per Segment | 27 | 27 | 31 | 27 |
| Time between pellets | 0.14s | 0.14s | 0.14s | 0.1s |
| Reload Time | 4.0s | 4.0s | 4.0s | 8.0s |
| Challenge Rating | 12 (normal) | 24 (normal) | 50 (normal) 55 (blood) | 20 (normal) |
Spiral Category | |||||
|---|---|---|---|---|---|
| | | | ||
| Normal | XLarge for Harpy | ||||
| Double Spiral Pattern (2 spirals at once) | Triple Spiral Pattern (3 spirals at once) | Double Spiral Pattern (2 spirals at once) | Triple Spiral Pattern (3 spirals at once) | Double Spiral Pattern (2 spirals at once) | |
| (15 / 2) Shots × 2 pellets per Burst | (16 / 3) Shots × 3 pellets per Burst | 12 Shots × 2 pellets per Burst | (25 / 3) Shots × 3 pellets per Burst | 36 Shots × 2 pellets per Burst | |
| Total Time of Burst | 3.0s | 1.5s | 3.0s | 1.5s | 10.0s |
| Reload Time | 5.0s | ||||
| Challenge Rating | 20 (normal) | 35 (normal) | 30 (normal) | 50 (normal) 55 (blood) | 5 (normal) |
Wave Category | |||||
|---|---|---|---|---|---|
| | | | ||
| Capacity | 15 Shots × 3 pellets | 30 Shots × 3 pellets | 7 Shots × 15 pellets | 7 Shots × 30 pellets | 7 Shots × 30 pellets |
| Time between Shots | 0.2s | ||||
| Reload Time | 4.0s | ||||
| Challenge Rating | 8 (normal) | 12 (normal) | 16 (normal) | 24 (normal) | 30 (blood) |
Alternating Wave Category | |||
|---|---|---|---|
| | | |
3 Rings × 20 pellets | 5 Rings × 30 pellets | 5 Rings × 30 pellets | |
| Time between Rings | 0.3s | ||
| Reload Time | 4.0s | ||
| Challenge Rating | 10 (normal) | 25 (normal) | 30 (blood) |
Dart Shot Category | ||||
|---|---|---|---|---|
| | |||
| Time between Shots | - | 0.2s | 0.2s | - |
| Shots per Burst | - | 6 | 10 | - |
| Reload Time | 1.5s | 3s | 3s | 0.17s |
| Challenge Rating | 3 (normal) | 6 (normal) | 12 (normal) | 17 (normal) 22 (blood) |
Dual Dart Lance Category | ||
|---|---|---|
| | |
| Time between consecutive darts in lance | 0.06s | |
| Lance Length | 5 darts × 2 sides | |
| Time between Lances | - | 0.5s |
| Lances per Burst | - | 3 |
| Reload Time between Bursts | 2.5s | 5.0s |
| Challenge Rating | 12 (normal) | 20 (normal) |
Multi Dart Lance Category | |||
|---|---|---|---|
| | | |
| Time between consecutive darts in lance | 0.06s | ||
| Lance Length | 4 darts × 3-way | 8 darts × 3-way | 4 darts × 4 sides |
| Time between Lances | - | - | 0.5s |
| Lances per Burst | - | - | 3 |
| Reload Time between Bursts | 2.0s | 2.0s | 1.5s |
| Challenge Rating | 9 (normal) | 14 (normal) 19 (blood) | 24 (normal) 30 (blood) |
Very Fast Cone Shot Category | |||||||
|---|---|---|---|---|---|---|---|
| | | | ||||
| 7-way dart spreads | 5-way dart spreads | 7-way dart spreads | XLarge for Harpy | ||||
| 3-way dart spreads | 5-way dart spreads | 7-way dart spreads | |||||
| Shots per Burst | 1 | 3 | 8 | 12 | 15 | ||
| Initial Time between Shots | - | 0.3s | 0.5s | 0.5s | 0.7s | ||
| Time Decrease between subsequent Shots | - | - | 0.09s | 0.09s | 0.07s | ||
| Minimum Time between Shots | - | - | 0.1s | 0.1s | 0.1s | ||
| Reload Time | 2.0s | 8.0s | |||||
| Challenge Rating | 8 (normal) | 14 (normal) | 25 (normal) | 40 (normal) 45 (blood) | 5 (normal) | 18 (normal) | 28 (normal) |
Lance Blossom Category | ||||
|---|---|---|---|---|
| | | ||
| Normal | XLarge for Harpy | |||
4 darts per lance × 8 lances × 3 rings | 4 darts per lance × 8 lances × 3 rings × 2 cycles | 4 darts per lance × 8 lances × 3 rings × 2 cycles | 4 darts × 8 lances × 10 cycles | |
| Time between consecutive darts in lance | 0.06s | |||
| Time between Lances or Cycles | 0.1s | |||
| Reload Time between Bursts | 4.5s | 4.5s | 4.5s | 8.0s |
| Challenge Rating | 15 (normal) | 30 (normal) | 35 (blood) | 10 (normal) |
Ninja Shot Category | ||||
|---|---|---|---|---|
| Fires Shuriken (Slow) | ||||
| | | | |
| Time between Shots | 0.2s | 0.2s | - | - |
| Shots per Burst | 2 | 4 | - | - |
| Reload Time | 1.8s | 1.8s | 0.2s | 0.12s |
| Challenge Rating | 4 (normal) | 9 (normal) | 20 (normal) | 30 (normal) 35 (blood) |
Vortex Wave Category | |||||||
|---|---|---|---|---|---|---|---|
| Fires Shuriken (Fast) | |||||||
| | | | ||||
| 3 segments × 5 shurikens per Burst | 3 segments × 9 shurikens per Burst | 7 segments × 3 shurikens per Burst | 5 segments × 9 shurikens per Burst | 5 segments × 17 shurikens per Burst | |||
| Time between shuriken in segment | 0.05s | 0.09s | 0.05s | 0.05s | 0.09s | 0.05s | 0.05s |
| Reload Time | 2.5s | ||||||
| Challenge Rating | 7 (normal) | 9 (normal) | 15 (normal) | 11 (normal) | 16 (normal) | 21 (normal) 25 (blood) | 30 (normal) 35 (blood) |
Vortex Wave Single Category | |||
|---|---|---|---|
| Fires Shuriken (Normal) | |||
| | | |
| Shuriken per Burst | 5 | 9 | 9 |
| Time between Shuriken in Burst | 0.03s | ||
| Reload Time | 1.5s | 1.5s | 0.05s |
| Challenge Rating | 6 (normal) | 12 (normal) | 35 (normal) |
Vortex Spiral Category | |||||||
|---|---|---|---|---|---|---|---|
| Fires Shuriken (Slow) | |||||||
| | | | ||||
| Sparse Pattern | Dense Pattern | Dense Pattern | Sparse Pattern | Dense Pattern | Sparse Pattern | Dense Pattern | |
3 Shots × 19 shuriken per Burst | 3 Shots × 19 shuriken per Burst | 5 Shots × 19 shuriken per Burst | 5 Shots × 19 shuriken per Burst | 7 Shots × 19 shuriken per Burst | 7 Shots × 19 shuriken per Burst | 9 Shots × 19 shuriken per Burst | |
| Time between Shots | 0.5s | 0.15s | 0.15s | 0.5s | 0.15s | 0.5s | 0.15s |
| Reload Time | 1.0s | ||||||
| Challenge Rating | 5 (normal) | 9 (normal) | 16 (normal) | 10 (normal) | 20 (normal) | 15 (normal) 20 (blood) | 25 (blood) |
Vortex Trench Category | |||||||||||
|---|---|---|---|---|---|---|---|---|---|---|---|
| | | | ||||||||
| Fires Shuriken (Slow) | Fires Shuriken (Fast) | Fires Shuriken (Slow) | Fires Shuriken (Fast) | Fires Shuriken (Slow) | Fires Shuriken (Fast) | Normal | XLarge for Harpy | ||||
| Fires Shuriken (Slow) | Fires Shuriken (Fast) | Fires Shuriken (Slow) | Fires Shuriken (Fast) | ||||||||
| Startup Time | 2.0s | 3.0s | 2.0s | 3.0s | 2.0s | 3.0s | 2.0s | 3.0s | 2.0s | 3.0s | |
| Time between shuriken in segment | 0.15s | 0.09s | 0.15s | 0.09s | 0.15s | 0.09s | 0.15s | 0.09s | 0.15s | 0.09s | |
| Number of shuriken per segment | 9 | 9 | 17 | 9 | 17 | 13 | 17 | 13 | 6 | 10 | |
| Number of Segments | 9 | 9 | 9 | 11 | 11 | 9 | 11 | 11 | 15 | 25 | 20 |
| Number of Switches between consecutive segments (Direction reverses from left to right, to right to left, and so on) | 10 | 5 | 10 | 5 | 10 | 5 | 10 | 5 | 5 | 5 | 5 |
| Reload Time | 5.0s | ||||||||||
| Challenge Rating | 13 (normal) | 15 (normal) | 30 (normal) | 20 (normal) | 45 (normal) | 30 (normal) | 50 (blood) | 50 (normal) 55 (blood) | 5 (normal) | 20 (normal) | 10 (normal) |
Boomerang Shot Category | ||||
|---|---|---|---|---|
| | | | |
| Time between Shots | 0.15s | 0.15s | - | - |
| Shots per Burst | 4 | 6 | - | - |
| Reload Time | 4.0s | 2.0s | 0.25s | 0.25s |
| Challenge Rating | 12 (normal) | 17 (normal) | 45 (normal) | 50 (blood) |
Boomerang Cone Shot Category | ||
|---|---|---|
| | |
| 5-way boomerang spreads | 9-way boomerang spreads | |
| Reload Time | 2.0s | |
| Challenge Rating | 14 (normal) | 25 (normal) 30 (blood) |
MIRV Ball Category | |||
|---|---|---|---|
| | | |
| Time between consecutive MIRVs | - | 0.25s | - |
| MIRVs per Burst | 1 | 3 | 2 at once |
| Reload Time | 1.0s | ||
| Challenge Rating | 25 45 (Brute only) | 45 55 (Brute only) | 55 |
Comet Category | ||||
|---|---|---|---|---|
| Exclusive to Brutes | ||||
| | | | |
Fires Tier 1 Comets
| Fires Tier 2 Comets
| Fires Tier 3 Comets
| ||
| Reload Time | 4.0s | 2.0s | 1.5s | 1.0s |
| Challenge Rating | 25 | 35 | 45 | 55 |